I hope you had a great week so far!
You might have heard the term "vertorama" before, to me it was quite new until sometime last year, when I discovered pictures with this tag on flickr. Curious as I am, I investigated and found out, that it's nothing more than a vertical panorama. I like the square format, so this was a wonderful opportunity to extend my landscape / forest shots, thus covering more of the ambience.
So, how are they achieved?
the photography
I usually take two or three pictures of a scenery, shooting them vertically. Just like I did with these two photos of a forest path:
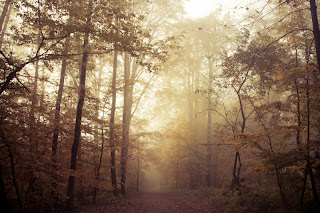 |
| picture 1 |
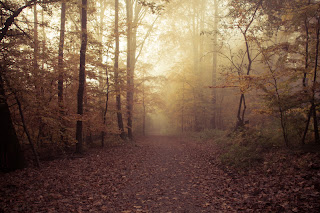 |
| picture 2 |
It is important, that you take these at the same aperture value and foca length, the speed might slightly differ, but should be close (if the light allows it to be). These two pics were shot at aperture 7.1 & 1/40 sec. with a focal lengt of 18 mm.
the software
You should take care, that there are enough distinguishable features in the picture for the stiching software .
I usually use Photoshop CS 5, but there others such as PTGui Pro 9, Hugin 2.0, Panorama Studio and Photoshop Elements 9. I don't know whether they work as well as PS, but if you don't own Photoshop you might try one of these. Hugin, for example is open source software, so its free to use.
It is quite simple in PS:
File - Automate - Photomerge - Reposition
Only - Browse - Select your files - Open - check Auto - OK
- Then sit back & let the magic happen..
After merging the two pics and cropping them to a square format it looked like that:
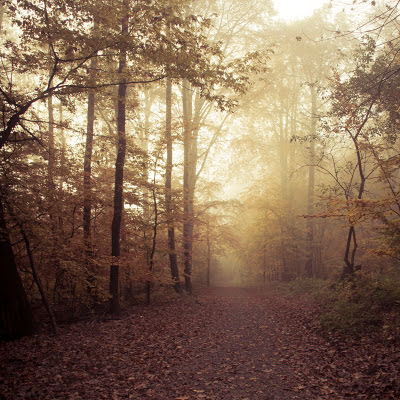 |
| Merged pictures |
As you can see, there was at least an overlap of 50 %, so PS had enough features to merge the pictures. It is usally recommended to have an overlap of at least 30% to avoid errors.
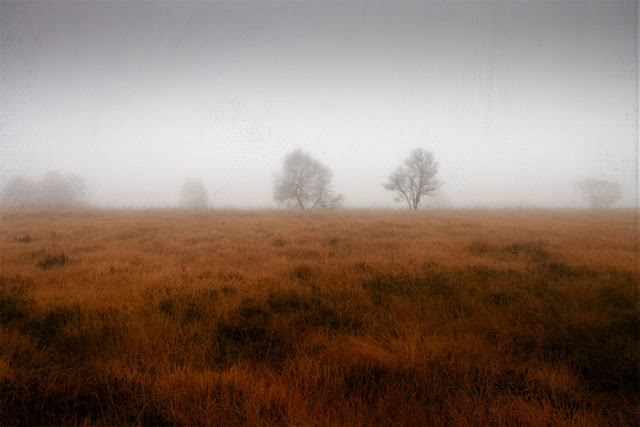
Texture and colour work
I had messed up these two pictures in Lightroom, thinking that a red tint would make this scenery more interesting. But I was to lazy to change this in LR again, so I tried to get it right with my other processing steps. It took me quite some time and inspired me to make some new colourful textures that I tried out by using this picture.
These are the textures I used:
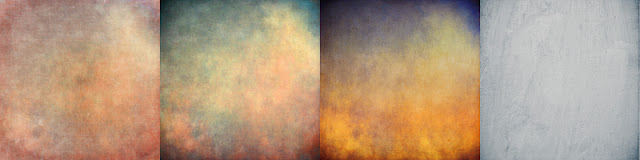 |
| 1. rosebud 2. sky-net 3. evening mood 4. white canvas brushes |
I had fun trying various textures and blending modes. Please take a look at the layer settings to see how it came to life.
I somehow re-invented the whole scenery making it my own, it felt like painting...
Again, I was surprised how textures can change a picture to the better.
If you want to have a look at other vertoramas check out my flickr set:
Vertorama
Thanks for reading & have a nice weekend!


Comments
Post a Comment