Featured

Winter Edit With Texture Overlays in Luminar Neo Including Two Free Textures

 Last January we had some days with snow and people were rushing out to have some fun with it before all melted away, which is often the case were I live. I took my camera and went out into the falling snow and saw some people from my neighbourhood with their kid sleighing down a small hill nearby.  Here is the finished edit of the scenery: Enjoying A Winter Day RAW - Edit in Luminar Unedited RAW Image -  I started with the Enhance AI tool. I set the Accent AI value to 32 which was enough and brought out lights and contrasts, which I found helpful with this monotone snowy image. -   I changed into the Develop module where I enhanced the Exposure always keeping an eye on the Histogram because with snow you quickly run into burned out highlights.  - I also decreased the Highlight a bit and added more blacks. Especially reducing the lights is helpful, because I found that blend modes such as Overlay and Soft Light work better when editing with texture overla...

The making of a texture & how I used it

Its autumn and I must admid I love the moods that light, fog and nature create in that season. I wanted to make a post about the creation of a texture and yesterday I found myself in a situation where I ended up altering a texture for a shot I took on a foggy morning last November.


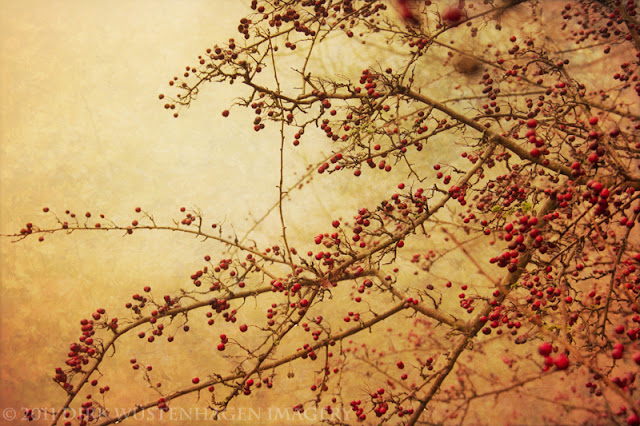
It is a photo of an meanwhile dead hawthorne tree full of red berries.  Of course, the original file wasn't that colourful and I wanted to give a real warm autumn feel to it. So I made my first corrections in Lightroom enhancing the red of the berries and using the colouring tool to give it a yellow tint:


Lightroom export

I also felt that the foggy parts on the pic's left side lacked interest, so I searched my archives for a suitable texture but couldn't find one that I was completely satisfied with.

I chose a texture I started to make some time ago and made some adjustments & alterations to get the one I finally used. I originally started with the folllowing picture:


original

Of course, I wanted the texture to be much finer so I decided to make a copy of the background layer and rotated it by 180° and got this:


Two layers, 2nd rotated 180°

Now I had a much finer pattern. I decided to add two layers of brush strokes to make the picture lighter and add some more structure to it.

Brush strokes

I copied this layer and set the first layer at 80% opacity / 100% fill - soft light, the second layer settings were 20% opacity / 100 % fill - hard light resulting in this:


First version of texture

I found the greenish leaves & branches  in the upper right  and the down left corners disturbing so I used Photoshop's patch tool to soften them. I also adjusted the colours and enhanced the red and yellow tones. I also added a dark red border and was finally satisfied with my new texture:


Autumn Leaves Texture

This texture will be part of a new texture pack I am working on, but you can download a higher resolution version from my Deviant Art account here: 
Download Autumn leaves texture

I'd love to see what you used it for. If you are a flickr member you can submit your work to my group

Thanks for reading!


Comments

  1. very interesting article, thks Dyrk

    ReplyDelete
  2. This is excellent! Thanks so much -- I look forward to following your blog. Love your work. I wanted to download this gorgeous new texture -- for some reason, I couldn't get the "download' button to work. Will try again later.

    ReplyDelete
  3. Nice article, thanks very much! I love the finished work, too - it reminds me a bit of an Arthur Rackham painting :^)

    ReplyDelete
  4. Anonymous17:46

    I really appreciate your generosity in sharing your process, Dyrk. This is such a beautiful texture and I can't wait to try it out. I will look forward to your posts here.
    -Cindy

    ReplyDelete
  5. So happy to see you have a blog! Thanks for posting this beautiful image and especially for explaining your technique. I look forward to more!!

    ReplyDelete
  6. I have never seen such a great post on making a texture. This is fabulous! I did try to download it as I would love to use it, but could not figure out how to download it from the web album. I look forward to exploring your texture set! Again, my compliments.

    ReplyDelete
  7. Thanks very much for your comments!

    ReplyDelete

Post a Comment