Hello,
sometimes I really like to challenge myself, meaning I'd like to change something really ordinary into something special...which isn't always easy as you can imagine.
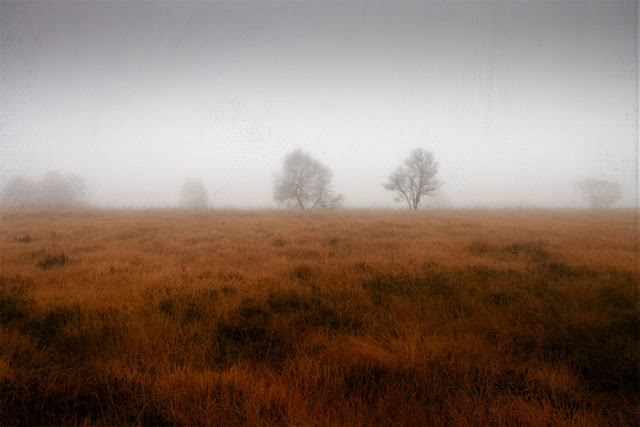
In case of the work at hand I had a vague idea what type of original photo I would need. Thankfully I remembered that there are some rather weathered birches close to where I live. So I went out, took some shots of them and returned home to begin with my work.
Please move over the picture to see the before/after, thanks!
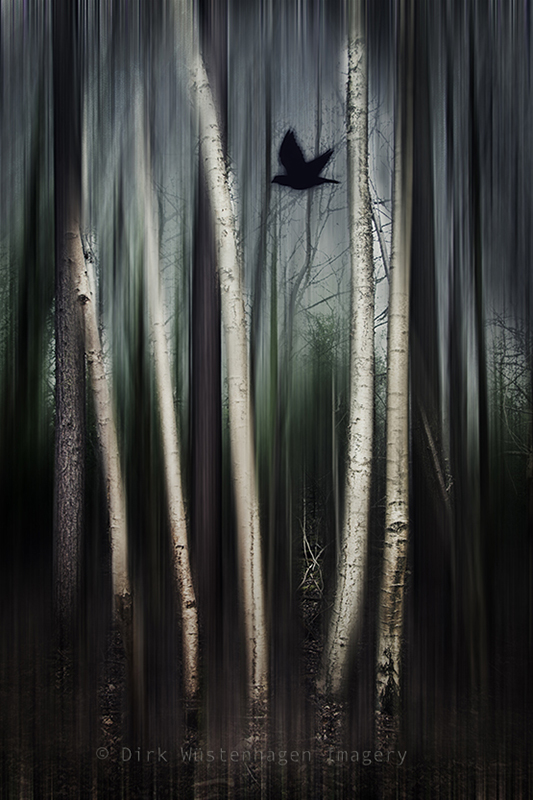 |
| One Wild Moment |
I liked the white bark of the birches and also liked the other trees in the background, because they provided some darker texture, that I knew I could use later.
Step by Step description
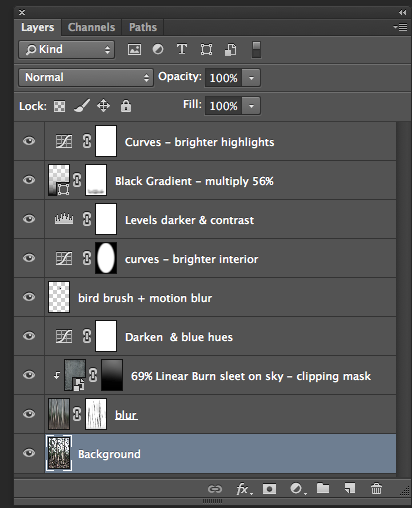 |
| Layers One Wild Moment |
- First I made a layer copy of the original picture.
I wanted to have an overall dark appearance with only hints of colour. As the sky was very bright I had to find a way to darken it.
- I chose a texture to achieve this. I selected the bright parts of the sky and only applied the texture on that part (Multiply , around 70% opacity).
- I then merged the copy of the background layer and the texture and chose a motion blur with an 90° angle and a Distance of about 250 px.
- I think it is quite boring to have a blurred picture like that and so I added a layer mask and started to paint black on that mask to bring out the trees and parts of the underlying background. For this task I usually choose a very low brush flow of app. 3-5 %, which gives you a lot of control.
- The sky was still too bright for my taste, so I again took the texture and plaid aroud with blending modes and a layer mask until I was satisfied. (see layer 3)
- Layer 4 added blue hues ( Curves: choose the blue channel and drag the lower left end of the curve up, that way you get dark blues in the blacks)
- With all the vertical motion I wanted to have a contrasting motion as well - I added an empty layer and selected a bird brush. I placed the bird in the middle and added a horizontal motion blur on the bird.
- Layer 6 function is to set a focus on the middle part of the picture with the bird in its centre.
- the two other layers I needed to further work on light and contrast.
That is all it need.
Have a great weekend!
Thankks very much!
|

Comments
Post a Comment