Hello all -
today another insight into my workflow regarding foggy landscapes. The picture I chose dates back a few years and was taken on a very misty November morning. I will show you how I
1. processed this in Lightroom
2. treated it in Photoshop
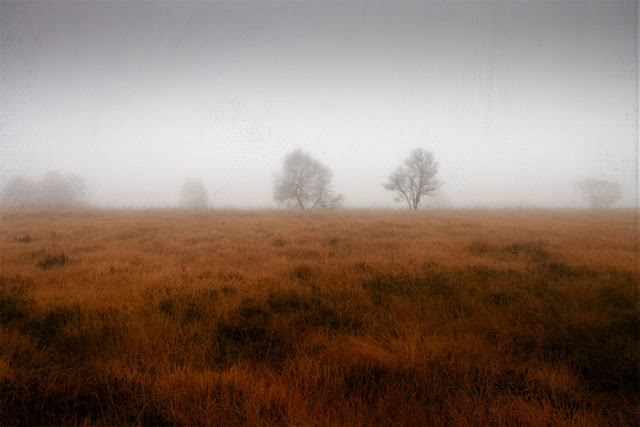
Before+after: Please move mouse over this picture!
 |
| Vanishing World |
|
Lightroom
OK, this morning I came across this picture. Apart from being rather dull and overexposed at first glance, I thought that it had some potential, that I wanted to bring to shine...
There isn't really much to see and it was clear from the start, that I had to later crop it, meaning to change into a square format.
Regardless, I started working on the uncropped picture.
Most of the time I use presets in Lightroom - either the ones I developed myself over time or I use some of the various free ones, that you can find on the internet.
If I like the tones I then start manipulating the contrast, sharpness and all other features that need correcting in my opinion. I also cropped the image in Lightroom and exported the file to Photoshop.
List with sites where you can find LR presets:
The-growing-list-of-free-lightroom-presets
Photoshop
I liked the tones and the enhanced contrast on the fence's poles, but felt something was missing in depth and light direction. This picture was also a welcome opportunity to check, whether my new
Summer Haze Pack textures work with this low contrast conditions.
I chose a few textures that were similar in tone and began playing around. That means trying out different blending modes at different opacity settings.
 |
| Layers Vanishing World |
As you can see, I used three textures.
Because the picture still felt flat I used a layer mask on the
Moss Garden - texture layer to change the light & brightness. Thus I was able to direct the viewers attention to the fence and the grass on the ground.
The
Stone brushed - texture helped to recover/ enhance the foggy atmosphere of the picture.
Though there were a lot of crows flying around ,there unfortunaetly wasn't one around when I shot this, so I used a brush to add the one you see in this picture.
Finally I corrected the contrast and added a blue hue using curves.
I also intensified the gras' yellow with he Selective Colors tool.
That's all!
If you like working with textures my different packs might be of interest to you:
Texture Packs
Have a nice weekend!!
Thanks for stopping by!
Dirk


Comments
Post a Comment