Hello,
it's been a while since I gave away a texture, but today I have a wonderful freebie that helps you add a nice vignette to your photos. I needed a texture for a close-up of a bird I shot on La Palma in March and I couldn't find one that I liked so I altered & changed an older texture.
To demonstrate what I did let me first start with a before and after of my photo:
Move the mouse over the pic to see the change!
 |
| Raven Portrait |
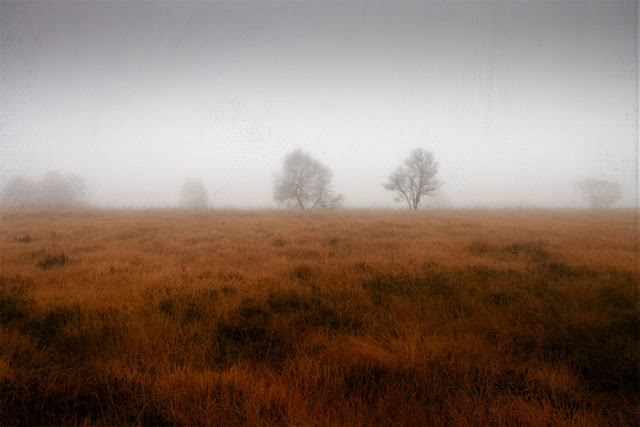
I used two of my free textures -
First a new one, that is the main texture in my picture:
Click on the picture to download it from Picasa!!
|
The other one is an older freebie, you'll find it here :
Click on the picture to download!
To make it easier to follow how I processed this picture I'll post the Photoshop layers for your information:
The background was very bright, almost white, so I used the texture twice.
The multiply - layer added a subtle structure to the background. As it made my subject too dark I erased the texture on the bird using a layer mask.
The second overlay-layer made the texture more visible and crisp.
I already had a nice vignette around my bird. I wanted to have a bid more light from the left so I added the forest light texture, which accentuated the bird's head and reduced the vignette in the top left corner of the image. I didn't need the green tones, so I changed the texture to b&w using a clipping mask.
Sculpting light with textures tips
- You can influence the existing light in a picture, but you can't create plausible light sources with textures
- you can strengthen parts of a picture, e.g. you can point to the main subjet (composition)
- use layer masks to erase parts that are disturbing or soften these parts using the blur tool
- use textures that provide a frame or a vignette or have a kind of light direction (from the sides, from above)
- try to invert very dark or very bright textures to see what they do
- experiment with blending modes
- use a light texture to brighten parts of a picture that are a bit too dark (using Soft Light / Overlay blending mode)
- use darker textures, e.g. to darken the sky or any other desired area ( e.g. by using Multiply or Color Burn blending mode)
I hope I gave you some ideas what can be done with textures when it comes to the manipulation of light.
Texture Promotion
My texture packs are still 15% off if you enter the Coupon code
FALLMAGIC12
Just follow one of the various links on this blog to the textures on my Homepage!
Promotion ends October 31, 2012!!!!
Thanks for reading!
Dirk


Thank you for the free textures and tips! I learn so much from reading your blog and following your Flickr Photostream!!
ReplyDelete