Hello, I hope you had a lovely week and a wonderful Sunday so far...
this morning I came across the photo of a sunrise I shot 3 years ago on my last morning on the beautiful island of Bali. It came out quite dark and I thought I give it a try to see how I would process it today. I always had the feeling, that I can do better than this, although people liked it.
The final result of my work is this:
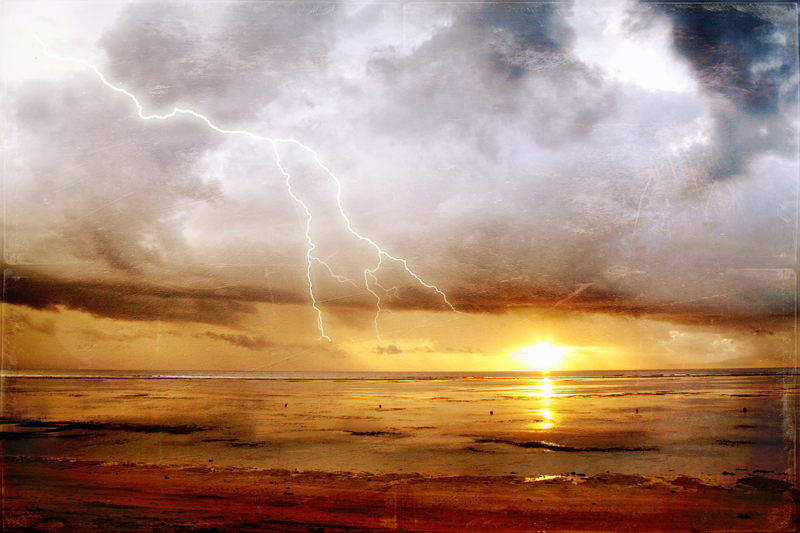 |
| the sky cracked |
Here is the pic I came across and that I decided to work on again:
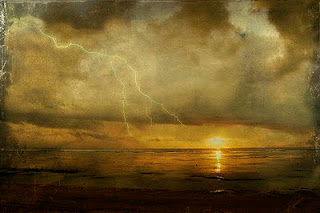 |
| Previous version |
I my opinion the foreground is far too dark and the picture has lost all of its depth. I used a texture I bought, which is quite nice, but at that time I was fascinatied with the grunge effect it had and didn't see that it overpowered the picture.
The processing
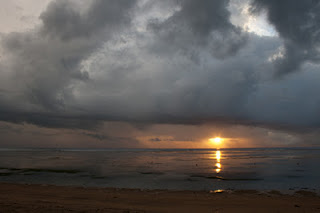 |
| RAW - file |
It started with this raw - file, that I decided to change into a HDR picture. I only used subtle adjustments, because I feared that the tonemapped picture would become to noisy and I didn't want to have an too obvious HDR- look. But it enhanced the foreground, making the beach & the sand more visible and gave some nice depth and detail to the sky.
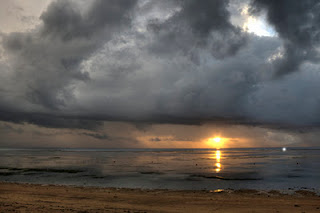 |
| tonemapped |
I then wanted to add a lightning flash. I found some brushes on the internet and was curious how they would work on this picture. I used one from
jelenajovovic.com . She has some wonderful brushes that you can use in your personal and commercial work.
The question was, where to insert the lightning without making it look too artificial. I think I tried several sizes, forms of lightning s well as places where it might fit in. Finally I was satiesfied and it came down from the upper left corner:
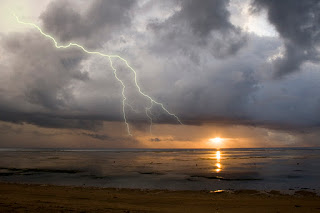 |
| tonemapped with lightning |
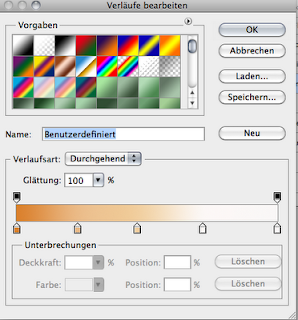
So the next steps are best explained - as usual - by using a screenshot of the levels in Photoshop:
 |
| Photoshop levels |
I started with the HDR picture and the already applied brush of the lightning. To achieve more detail in the foreground and make it more bright I added a gradient layer from white to transparent and changed the layer mode to color dodge and played with the opacity & the fill sliders until I thought it right. (layer 2)
The next two layers I added were the colour gradient and the texture layer. (layers 5 & 6)
I wanted to inensify the existing dark yellow colour of the sunrise so I thought decided to add another gradient layer, this time from orange to white (pls see screenshot)
 |
| orange - white gradient |
This made it brighter and made the existing orange / red colours glow.
The next thing was the choice of texture.
I loved the grungy look of the texture I previously used, but decided to take one of my own from the
Build-your-own-texture-pack.
When using a texture it is recommended to start with a texture, that has similar colours. That's always an easy way to achieve wonderful results.
So chose my Glass & Metal texture, that has this wonderful red tone:
 |
| Glass & Metal |
I rotated the texture by 180° so that the light red part was on the beach and sea and the more darker and grungy parts were on the clouds. With the settings I chose the picture became quite dark and after trying some techniques I finally decided on adding the two layers that would brighten the image.
One was a curves layer that gaines a bit more light & contrast and the other was a levels layer for brightening the highlights. I had to place them after the white gradient. They didn't work anywhere else.
After that made some final colour adjustments and was satisfied with the result.
So, that's it for today.
Thanks for reading!


Comments
Post a Comment