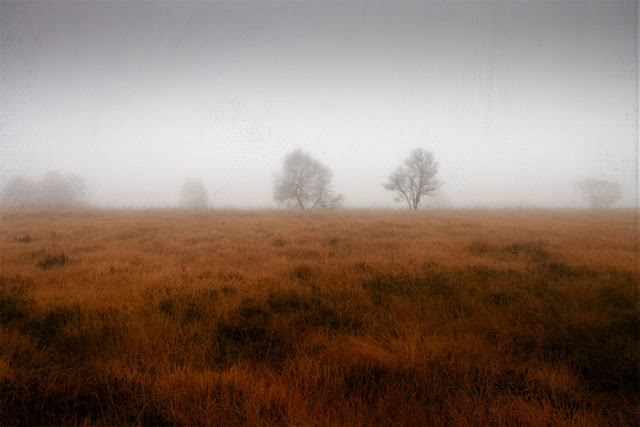
Creating Three Moody Images out of One Shot
I initially didn't plan to create three or more different images out of this photograph. I wanted to see how I can edit this foggy somehow chaotic forest image in Luminar Neo. I liked the atmosphere and I can still recall the morning I took this photo. I knew I had to make a lot of chnages , because of all the distracting twigs on the left and right hand side as well as at the top of the frame.
First Step - Editing in Luminar Neo
I usually develop my images in Lightroom Classic but decided to use Luminar Neo this time because I wanted to see how their various creative in part AI powered tools inspire me.
Basic edits were quickly done. I usually start with Luminar's Enhance AI, I found this tool often leads to considerable improvements to build upon.
I then moved to the Develop section to make further basic adjustments such as exposure, highlights, shadows, contrast and so on until I am satisfied.
As this image has almost no colour I didn't bother to edit these.
Getting rid of the twigs with GenErase?
When it comes to erasing distractions in images AI powered tools such as GenErase are to goto tool these days. I didn't expect that it would be able to do a good job with all the small twigs without creating some weird structures.
I didn't succeed doing a good job and I am sure that Photoshop wouldn't have created a better result (that is my experience with similar images)
Creative edits in Luminar Neo
I felt that the image isn't interesting as is so I decided for a more drastic treatment.
I used the motion blur filter to create an abstract of this misty forest scene neutralizing the distractions this way.
Still I was missing some colour and added these using one of the LUTs available the Atmosphere section
These edits resulted in this image:
Further edits in Photoshop
Although I like Luminar's creative possibilities this program can't replace Photoshop because of my sometimes elaborate edits that require many layers and other technques that Luminar isn't designed to handle.
The first PS edit based on the above image is this one:
I saw myself walking through this scenery so I inserted a cutout image of myself walking and placed it in the middle. I also erased the tree trunk on the right side of the image using Photoshop's Remove Tool.
I painted red colour on the forest floor that corresponded great with the textured sky overlays I added.
I had to adjust the light and the contrast and was pleased with the result.
Now I was curious what else I could make out of this image.
I once again went to the Luminar result and started searching for a fitting texture overlay that would change of change the atmosphere of the image.
I finally chose this texture:
I placed the overlay on the image and used Bled_If, because I wanted the texture only to add an effect to the lighter parts of the image.
I again painted red on the forest floor that also matched the red of the clouds and also made the forest floor a bit brighter.
With some experimenting one can make interesting images out of dull pictures.
You'll find my textures
here
Thank you for your interest.


That sounds amazing! Using Lumina Neo and Photoshop to create three distinct moody edits from a single photo showcases great creativity and skill. Looking forward to seeing the stunning results
ReplyDeletehttps://clippingservicestudio.com/
The post is a very informative article, and it is very well guided. Anyone can understand it. Thank you for sharing it.
ReplyDeleteGreat tutorial topic! Using blur filters in Photoshop to create minimalistic landscapes is such a creative way to turn simple shots into artistic masterpieces. It really shows how editing can transform mood and storytelling in photography. -mypixeler
ReplyDelete