Hello,
it is that time of the year again that I really love to capture.
I still have to wait for the right weather over here, but the forecast is very promising for the next days, so I better get my gear ready...
Going through my shots from last fall, my eyes fell on two shot. First I didn't realized that they had a lot of potential. These were ideal candidates for a moody and misty autumn vertorama.
A
vertorama is a vertical panorama of two or more shots merged together in Photoshop or any other suitable software. Have a closer look at this technique here:
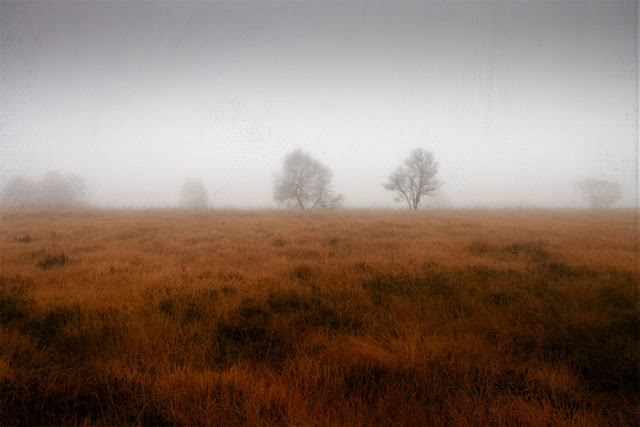
First I'd like to show you the result of my work:
Please move over the picture to see the before/after
Preparing the files
I started out with two photos that I had to capture with different settings.
I knew that I wanted to blend these two, but the problem was the dark foreground and the very bright sky with the sun about to come through the mist.
That meant I had to process them differently - I started with the bottom pic:
It was shot at 1/125 s Iso 200 and f 10
Apart from the tones I enhanced the foreground with a gradient filter and played around with the curves layer to get as much detail as possible without losing the misty softness.
When I was satisfied it looked like that:
One can copy the processing of a picture and apply it on another shot in Lightroom, that's what I did with this, although I was sure that it wouldn't be perfect and that I had to correct at least the exposure.
The raw file looked like that:
It was shot at 1/400 s Iso 200 and f 10
I applied the settings of the first picture and had only adjust the light hoping that my corrections would be perfect for the merging. I checked the histogram while doing the adjustments, but it only took a bit of playing around with the exposure setting to achieve a picture suitable for merging.
I skip the merging of the two pictures, because I covered this in a previous post that you can check out using the link I posted at the beginning.
Textures
My goal was to keep as much of the atmosphere and tones as possible or even enhance the whole picture a bit by my choice of textures
Please take a look at the layers:
It took quite some time to find textures that added something interesting to this -
Rose Mist was perfect, because it added a rough red frame to the sky - a perfect addition to the red bottom of the image.
Worn Map brought a bit grunge and light to the dark tree leaves in the upper left corner of the picture. After adding the textures I only had to correct the red tones a bit and I was satisfied with the result.
Thanks for reading!
Fall Promo - save 15% on all texture packs
I am pleased to announce another promotion for the rest of this month.
Enter the coupon code
FALL2014
at the check-out to save 15% on all texture packs !!
Have a great weekend!
Dirk


Comments
Post a Comment